Face to Face playbill

face-to-face.jpg

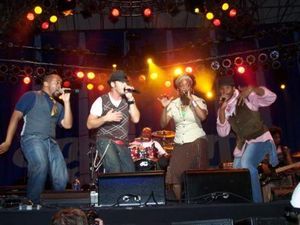
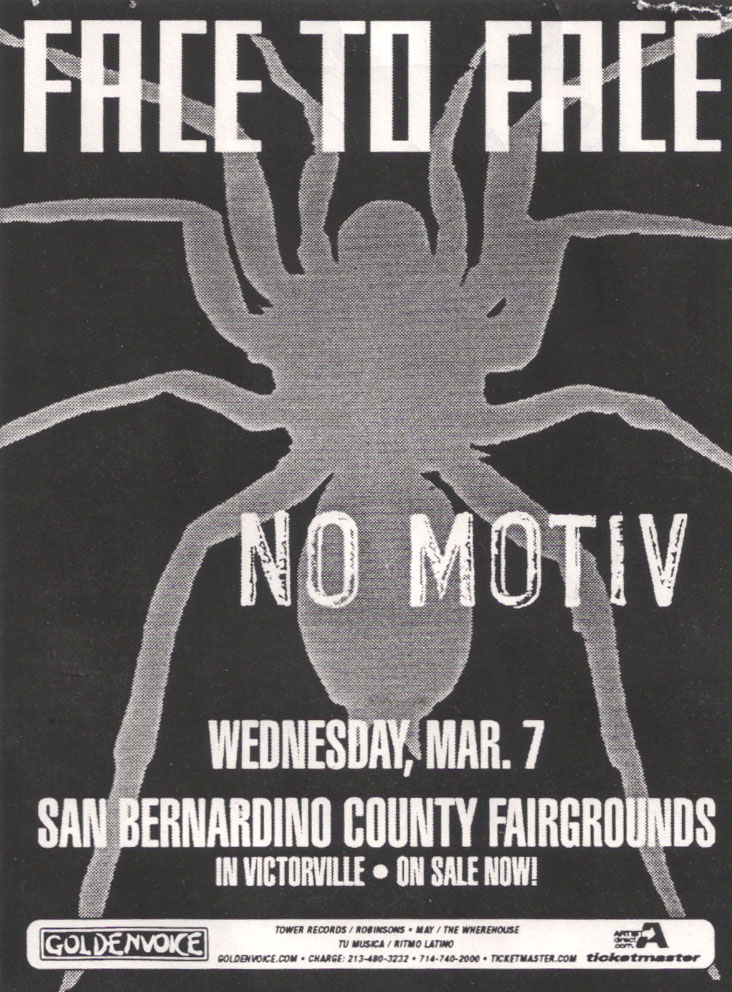
A concert playbill for punk band Face to Face and No Motiv at the San Bernardino Fairgrounds.

Face to Face is from my old stomping grounds in Victorville, CA. Rob Kurth, their drummer for many years, played drums on several tracks that I mixed and mastered in the recording studio. He is an excellent drummer, not just for punk, but for pop styles as well. Very solid player.

Origin    Victorville, California
Country    USA
Years active    1991-2003
Genres    Pop punk, Skate punk
Labels    Dr. Strange Records, Victory Records, Vagrant Records, A&M Records, Fat Wreck Chords

facetoface58.jpg

Beginnings

face to face originally formed in 1988 as a local band under the name “Zero Tolerance”[7] by Keith (guitars, vocals) and Matt Riddle (bass), who had been friends since high school during this time. They found Rob Kurth, as their drummer, through mutual friends and started writing and rehearsing, although Zero Tolerance never released any recordings. Kurth’s friend Mark Haake joined on as an additional guitarist for a couple of months before getting orders to the Middle East with the Air Force. As a 3-piece, the band played a show at Spanky’s in Riverside, California, and a couple of other local shows. When Haake left, the band continued as a 3-piece and changed their name to “face to face” in 1991.

The band continued to play frequently throughout the Inland Empire and Orange County and quickly became a local favorite alongside bands like The Offspring, Guttermouth, Voodoo Glow Skulls, and others. At one of the local shows, the band met Bill Plaster of Dr. Strange Records. They decided to do a record together and face to face entered the studio at Westbeach Recorders in Hollywood, California to record songs for their first album, Don’t Turn Away (1992). Once the recording was finished (in 2 weekends) there was trouble getting it released; in the interim the band met Jim Goodwin. Goodwin offered to record the band’s new songs for free, and they entered the studio to record songs such as, “Nothing New,” “Pastel,” and “Disconnected”, which also ended up being on the Don’t Turn Away album.

As a four-piece band

In 1993, just after a three-week tour in Germany supporting Lagwagon, face to face added Chad Yaro as an additional guitarist to fill out the sound of the band. Before the band would work on their second album, they made a decision to go with a then-new label that had major-label distribution. The label, Victory Music, signed them and then they entered the studio with producer Thom Wilson (of The Offspring fame) and began recording their second album, entitled Big Choice.

The label was nervous about their distribution deal and wanted a test release to run through the system, and the band put together an EP of songs from 7″s and other rarities called Over It. The EP was released weeks before Big Choice and the label had a remixed version of the song “Disconnected” on the play list at KROQ-FM in Los Angeles, California. Because of the success of the single on radio, the label convinced the band to add “Disconnected” to Big Choice as a bonus track (a third recording of the song); additionally, a cover of The Descendents’ “Bikeage” is included as a bonus track. After touring with bands such as NOFX, The Mighty Mighty Bosstones, and The Offspring during 1995, Riddle left face to face and went on to play in 22 Jacks and Pulley before settling on No Use for a Name. The band replaced him with a then-unknown bassist, Scott Shiflett.

In 1996, face to face began writing and recording their third album, which is self-titled. This being the first record without Riddle, who had been Keith’s songwriting collaborator, Keith wrote the majority of the songs with some help from Shiflett and Yaro. They recruited Jim Goodwin again to record and produce the record. Following the release of the album, they joined the Warped Tour in 1997. After the release of their self-titled album, Kurth left face to face in early 1998. To finish out the touring cycle for their self-titled record, the band replaced Kurth with Jose Medeles, who was out with them on a co-headlining US tour with the Reverend Horton Heat band, before taking a break to write and record their next album. After Pete Parada joined the band as Kurth’s replacement, the band started writing and recording two more albums (with producer Chad Blinman), Ignorance is Bliss (1999) and Reactionary (2000), before Yaro left the band in 2001.

Post-Yaro period

Following Yaro’s departure in 2001, face to face decided to stay a three-piece again and began writing material for what would be their sixth and final studio album, How to Ruin Everything. After getting out of a less than desirable deal with Beyond Music, How to Ruin Everything was released on Vagrant Records in 2002. Following that, the band headlined and joined The Warped Tour for the first time since 1997.

Breakup

In 2004, after announcing their breakup, it was announced that face to face’s hiatus would be permanent as their official website displayed “Don’t call it a come back”. They gave most of their fans a proper farewell with “The Only Goodbye Tour” of 2004 with supporting acts My Chemical Romance and Seconds to Go, which followed the raucous Warped Tour finale in Boston. Orlando fans had their farewell show cancelled due to Hurricane Charlie. It was rescheduled as the last date on the tour, but that show was also cancelled.

Creation 2007 – Creation Northwest

creation-2007-gorge.jpg

Creation 2007 Northwest at the Gorge Ampitheatre in George, WA. Here are some pictures from the Creation festival. Visit the Creation concert series website.

I’m told that David Crowder stole the show with a very inspiring performance. Was also told he played the guitar from the video game “Guitar Hero” as well as a toy keytar. And you know I love keytars! Visit the David Crowder Band website.

*Note* – I’ve been told that some of these pics are from Creation 2006.

creation-2007.jpg

Creation 2007 Main Stage

creation-arial.jpg

Aerial view of the Gorge in Washington State

baptism.jpg

Baptisms at Creation

candle-lighting.jpg

Evening Concert and candles

casting-crowns.jpg

Casting Crowns performs in concert

david-crowder.jpg

David Crowder

david-crowder-jesus.jpg

toby-mac.jpg

Toby Mac

Bands, Musicians and Events at Creation 2007

Relient K • Switchfoot • Newsboys • Toby Mac • David Crowder BAND • Chris Tomlin • Jars of Clay • Kutless • Leeland • Emery • Barlow Girl • Hawk Nelson • Thousand foot Krutch • Skillet • Superchic[k] • Downhere • Disciple • KJ-52 • Sanctus Real • Phil Wickham • Falling Up • Pocket Full of Rocks • Group 1 Crew • Ayiesha • Woods • Aaron Shust • Starfield • Britt Nicole • Project 86 • MXPX • Family Force 5 • Stellar Kart • Run Kid • Run • Ruth • House of Heroes • Fireflight • Red • Voice • Everyday Sunday • Day of Fire • SPEAKERS Ron Luce • Bob Lenz • Harry Thomas •Reggie Dabbs • Pam Stenzel • Jeremy Kingsley • David Burke • Michael Yankoski • Jose Zayas • Justin Lookadoo • Zoro • OTHER FEATURES Candlelight Service • Prayer Tent • Fireworks • Gear Giveaway • Huge Video Screens • Exhibit Area • Youth Leaders VIP Area • Youth Leader Seminars • X-Games • Mountain Top Lookout • Food Court • Water Baptism • Campfires • Beautiful Camping • Fun Contests • Modern Worship Tent • Musician Seminars • Comedy Night • Blues Night National Talent Search • Skateboard & BMX .

Hitting the Big Time: Recycled on Ebay

new-faces.JPG

Well either I’m on my way up or on my way down. Just by chance I saw an auction on Ebay where someone is selling a CD I produced. The CD on the right in this picture is the New Faces Volume Four that I produced for Road Records recording studio in Southern California. Ironically, Road Records (Victorville, CA 1989-2004) never sold any CD’s in the New Faces series. They were given away free as promo. Artists paid small fees for combined recording time and duplication of the project but the record label never sold them directly to the public.

My life is being recycled on Ebay. I always wondered how artists must feel when they see their CD’s at the dollar store!

Track List from New Faces Volume Four
(Thanks to my Ebay buddy)

1) Intro – My Mom
2) Conrad Askland: Let’s Get The Party Started
3) Mudfish: Shotgun Sam
4) Sarah Caruso: The Right Touch
5) I Have A Hairy Back
6) Broken Melody: Broken Haerted Shoulder
7) Things Go Better With Butter
8.) Butter: It’s All Good
9) Gailyn Addis: Best Lie
10) Brothers Of The Creed: Medulla Oblongata
11) Teething: Ascend
12) Charlie Freak: Amnesia
13) Sarah Caruso: Stupid Girl
14) Robby Combs Band: I Glorify
15) Cheryl: Satterlund
16) Conrad Askland: Honey Will You Love Me
17) Violet Minds: 20 Days To Hollywood
18) 627 Band: Soy
19) David Siaki: Welcome Home
20) I Record at Road Records
21) Jim Nettles: Angel
22) Result Of Christ: Never Again
23) Off The Record: Move Along
24) Manny Gutierrez: Moonlight Dance Serenade
25) Angie LaDuke: Couldn’t Give Up Everything
26) Paula Sezsmith: Worry ‘Bout Nothin’
27) Deveraux Divens: Police Rap
28) Opposite: Who Cut The Cheese
29) Radio Active Donuts
30) C. Diggs & K Etheridge: Agnus Dei
31) Elena: Friend
32) Minister Fred Reliford: Stop Running
33) Sean Clavin: The Tragic Spaniard
34) Carlotta Diggs: I’m Alright
35) Missing Link: Sconte
36) Versatile Aggression: Conscience Lost
37) Mr. Kyung Soo Him: Korean Choir
38) Gina Keller: Thru Your Love
39) Rachael Kime: I Wanna Go To Mars
40) Monty Jackson: Today
41) Billy

Tips on Producing Vocals

During a vocal recording session I was producing for an album this evening several things came up that I thought might be good to address. Producing a vocal track can be a bit of a mystery in approach and there are many mistakes a producer can make in the process. Here’s my two cents worth of input for up and coming producers.

Producer’s Role on Producing Vocal Tracks

As I’ve said many times on my blog, a music producer’s role is to produce music. That means you produce a product. That means you produce a good vocal track. It is a non-issue how talented the vocalist is or how prepared they are or anything else, your job is to produce. Being a “good” music producer means drawing out the best product you can from your artist. There is NO excuse to drawing out the best you can. The more you do, hopefully the better you’ll get at it.

Getting the Artist to Hand You the Ball
As producer, you should have a repoire with the recording vocalist. If they have not yet handed you the artistic ball to run with the project, then you are not yet the producer. Before I start on any serious recording project (karaoke and throw away demos will be what they will) I make sure I have been given the artistic license from the artist and the flexibility to produce the track. If I’m going to be responsible for a track, I need the license to make changes and adjustments on the fly without having to explain every move. This is the most important aspect of recording in my opinion. Make sure you and the artist are on the same page about your role in the project. If for many varied reasons the artist will not hand you the ball to produce the project, then you are not the right person for this particular project. As much as it might hurt, do not accept the project as producer. Turn the project down or re-negotiate your role as simply an engineer, etc. “Too many cooks in the kitchen spoil the soup.”

Basic Things You Should Know About Vocal Production

These are basic things I assume every music producer knows, which probably means not everybody knows these things. 🙂

  1. Try more than one microphone on the vocalist and compare tracks blind for the best sound. I most often use a Neumann mic for vocal tracks, but always test with my AKG’s, CAD and other mics. AT LEAST try two different mics. You should brainwash yourself as a producer that you are not really producing unless you’ve compared at least two mics on the vocalist. Once in a blue moon you’ll find your main vocal mic has a broken diaphragm, was accidentally turned backwards (yes, it happens – I always check out of habit, even if I’ve used it a thousand times) – or you may find that this particular vocalist sounds best singing through your kick drum mic (Yes, I’ve had this happen too. I know a famous songwriter/singer from Texas that has recorded vocal tracks with an AKG D-112, normally a kick drum microphone).
  2. No contact with mic or cables. Make sure the vocalist is not in contact with the microphone stand, microphone itself, or any cables connected to the mic.
  3. Treat the wall behind the recording mic. If in a sound booth or closed environment, pay special attention to the wall behind the microphone. This is where your prominent reflections of sound bounce back and may cause comb filtering (frequency cancellation). Unless you are in a pro setting with designed treatments, go ahead and pad 50% of the wall behind the mic. Auralex foam blocks work fine. Pick up a kit at a pro music store. Cardboard egg crates? I don’t know who started that, but it’s silly. Cardboard doesn’t shape your sound well, it’s more of a visual thing to say “See, we have a studio”. I would rather use blankets from U-Haul as padding if you’re in a pinch.
  4. Experiment with microphone distance and slope. Try the mic at different distances from the vocalist as well as different angles. How does the sound change with the mic facing the vocalist’s eyes, then sloped down toward their mouth. Or under the vocalist angled up – or straight on. “Proximity effect” is the bass response you quickly lose as a vocalist is further away from the mic. For rap and spoken word recordings you may want the vocalist right on the mic to get that nice natural bass presence (For rap and spoken word you’d use a different microphone that would already be designed for very close vocals – the mic will normally look like a big long tube. Don’t want to mention specific models, but Howard Stern and most DJ’s use the same mic – that’s the one to use for rap and spoken word.) Sometimes you WANT the voice to be a little thinner, so you’d just back the vocalist from the mic a bit.
  5. Singers should not talk much between takes, if at all. Singer’s use different voice placement when talking than when singing. If they talk excessively between takes, they are ruining the vocal placement that the record producer (In the year 2600 I will still call us “record” producers) has worked to gently attain. Don’t undo the work. Be quite between takes.
  6. Warm up your tube gear. If using tube processing on vocals, which is HIGHLY recommended, be sure to warm up your gear ahead of the session so it’s ready to go when the vocalist shows up. You want the same sound from take to take for consistent composite tracks.
  7. Composite tracks. Few hits these days are recording from beginning to end in a single take. Have the vocalist record multiple takes of the lead vocal and keep them archived. From these the engineer/producer will take the best parts of each take to make a final composite vocal; the “perfect” vocal track. For this reason, it’s important to keep the sound consistent from take to take. This means monitoring that the vocalist is maintaining the same position and that gear has not changed settings. I use Pro Tools and will make notes on each track of the different equipments settings so I can setup the exact same environment anytime down the road. Keeping detailed notes is automatic for any good engineer, and it’s part of the studio producer’s job to make sure that’s happening. It will make your editing process much more enjoyable.
  8. Windscreen and Pops. Mic screens are to eliminate plosives – like “puh”, “foh”, etc. You usually should use a wind screen of light nylon material – I don’t dig using nylons for this; just buy one made for this purpose. I don’t use a windscreen if the vocalist doesn’t move a lot of air. If that’s the case I listen very closely for plosives during recording and make sure I have plenty of takes to choose from in case I missed a couple.
  9. Bad Day? Cancel the session. If you’re vocalist isn’t up to their par in the first thirty minutes of recording; cancel the session. They will usually be relieved. Let them know it’s nobody’s fault, it’s just not the right day. Vocalists do have “bad days” unlike many other instruments. I am a keyboard player – I don’t ever have “bad days” on keyboards. But vocals are a flesh and blood instrument. Let the vocalist know the reason you are doing it is because you want the best product possible for them. You should know the vocalist’s chops well enough to know when to make this call. If it’s because the truly can’t sing any better then it’s a bad call to do this. If I cancel a session in the best interest of the artist’s project it will usually be free of charge. I won’t charge them for the session. That way they know your motives are true and you are truly engaged in the outcome of their project. If they partied all night and you have to cancel because their voice is hoarse then that’s their problem. Charge them. If the vocalist says “Let’s try again, I know I can do better” – give them a couple shots. 99.9% of the time it still won’t be what you want. Reschedule the session.
  10. Tea time. Always have non-caffeine tea on hand for the vocalist. Never serve boiling hot, just warm. Many singers show up for sessions with the rush of the world still spinning their head around. If that fights your project, relax them with tea. Don’t start the session until they are in the proper mood for the style they are recording. If that means talking with them for 30 minutes about Philosophers of Ancient Greece – then that’s what you do. Have your gear ready so when they’re in the proper mindset you can hit the gates.
  11. BGV’s – Background Vocals. The best person to blend with the lead vocalist IS the lead vocalist. Once the composite track is done, have the recording artist record some of their own harmonies before you bring in other background vocalists. Let the artist have fun with it and experiment. Only keep what you think will work. Unless the lead singer is a studio artist, let them take the easy parts they hear first. Fill in the harmonies with your studio pros on the harder-to-hear harmonies. *NOTE* – Background vocals are often more breathy than the lead vocal. One little trick to getting a nice choral blend. If it works for your project’s sound, have the lead vocalist try singing breathier for BGV’s. Only if it’s fun and easy for them to do. If it’s gruelling work, save it for the studio singers.
  12. Pitch Correction – Once your composite vocal track is finished I would recommend doing a pass just listening for pitch errors. This all depends on the project. Some pitch errors are good in certain styles. To my ears on a standard pop vocal track, the lead vocal has a problem if it’s more than 10 cents off. A half-step has 100 cents in it, or 100 degrees between each half step. 15 cents is “yucky sharp” and 8 cents is “should I fix this?”. Yes, you probably should. I have not found any software that you can just set and let run for an entire track. You really need to do it by ear on a note by note basis.
  13. The Wizard of Oz. Do not let your vocalist be present when you edit and compile their lead vocal track. Vocalists will ask you to sit in because they are fascinated by the process and want to learn. Then within a short time they will think about quitting music altogether when they see how many edits you really do. Let the vocalist come back and hear your final composite with pitch corrections, eq and fx in the mix. Most of the time they will say “I don’t remember singing it that well.” Shut up and smile. That’s what they hired you for. Of course if they want a change in the composite vocal or want to re-sing something, by all means let them. But wait until they’ve heard your edited work first. One more time: DO NOT LET THE VOCALIST WATCH YOU EDIT THEIR TRACKS! I’ve had MANY vocalists say “I’ve tried other studios but I sing better with you.” Which actually means, “You are more precise in your editing and engineering approach.” 🙂
  14. No New Vocal Lessons During Project. Want to have your vocalist become a dog overnight? Then have them start with a new vocal coach in the middle of your project. The time for vocal lessons is BEFORE doing a recording project or AFTER recording. When taking voice lessons, artists will usually get worse before they get better. Due in part to the fact that they will have to unlearn bad habits to pick up new ones. This is a slow process. All that will happen is they will sound worse during your recordings. Vocal study is a lifelong effort. Not something to change people overnight. I have been through this so many times with artists that now I tell them to actually cancel new lessons if they haven’t already started. Please note: I’m talking about NEW voice lessons with a new instructor during the middle of a recording project. Continuing voice lessons is usually fine.
  15. Check Headphone Levels Yourself. Listen to the vocalist’s headphone level before you have them listen. Many vocalists don’t really know what levels they should have. It should be loud enough so they can get lost in the music but not uncomfortable.
  16. Check Vocalist Headphone Level. The vocalist should be louder in the headphone mix than they might be in the final mix. They should hear themselves well from the headphones so they have good control of pitch.
  17. Controlling Intonation with Headphone Level. If your vocalist is singing flat, lower their vocal level in the headphones. They are hearing themselves too much and not supporting their singing. If your vocalist is sharp, raise their vocal level in the headphones. They are not hearing themselves enough and are pushing to hard to create volume.
  18. Live Performance Microphones are Not Studio Microphones. That microphone you use to gig with your band. It’s not a recording mic. Get a dedicated studio vocal mic. Only use it in the studio. Don’t take it to gigs. That software that will make any mic sound like any other mic. Uh-huh, I’ve got that too. Buy a studio mic. Things have changed, you can get a decent studio mic now for under $300 as a starter mic. Alpha-Beta is a supermarket chain. If your recording studio vocal mic has any of those words in it’s name, it’s not a studio vocal mic in my opinion.

PRODUCING THE VOCALIST

The hard part. If you are producing a legit vocal track for a “singer singer” then nothing will do but the best they can do. It’s important to know how hard you can work them and what their limits are. Also important you understand about vocal anatomy. The best way to get that experience is to take lessons or watch lessons of an experienced vocal teacher.

DUMP YOUR INNER GEEK – If you are a modern producer chances are you’re also a geek. You know about computers, bit rates, time code, Midi, music theory and everything else geeky. Let’s say your vocalist is getting a thin grating sound on their high notes and you know it’s within their range to do better. It would be unproductive to say “Those high notes sound thin and grating, can you sing them better?”. That’s your Inner Geek talking. Knowing about vocal anatomy and using visualizations will help them more than technical data (unless they are a trained studio or pro singer, which often isn’t the case.)

THE CONCEPT – The idea here is not to instruct your vocalist directly with technical data. But to direct them indirectly with visualization. It’s highly effective in a studio setting.

Here are some examples of what’s happening and different responses as a guide.

VOICE SOUNDS THIN IN HIGH REGISTER

  1. “Your voice sounds thin in the high register. Please change it” NO
  2. “Use your diaphragm to support more in the high register” NO
  3. “As you go higher in range, think down on the note, as if you’re looking at your toes” YES

VOCALIST IS NOT PROJECTING

  1. “Can you sing louder?” NO
  2. “Use more breath support” NO
  3. “Imagine you are singing through this wall and on to the other side” YES

EMOTION IS NOT COMING THROUGH
(Sad song as example)

  1. “Can you sing with more emotion?” NO
  2. “Can you give it more?” NO
  3. “Have you ever thought of suicide? Think of that when you sing.” YES

(What? This is an example of shock factor to get the artist to personalize an experience that will affect their performance. You must make it personal for them – the example you choose would depend on the song subject and knowing your limits with the artist. I actually used this technique on a song, which happened to be about saving someone from suicide, so it was appropriate in that instance. FYI, almost everyone has thought of suicide at one point or another, so it’s a slightly risky trick to get an artist to pull from deep latent emotions. Just an example.)

EMOTION OF SONG NOT COMING THROUGH #2
(Song is about playing on beach)

  1. “Think of what this song is about” NO
  2. “Think about the words” NO
  3. “Remember the first time you built a sandcastle at the beach? Was it fun? Think of that” YES

(The thing here is to give the artist visualizations that can encourage the delivery of the text. The artist is limited by their small perception of their own song. Give them new imagery to use that is fresh for them. They’ve been living with the lyrics of their song for a while now and it’s getting stale to them – keep it new.)

GUIDING GENTLY – THE RULE OF THREES

In a final produced track it can be difficult for people’s ears to track more than three main elements at a time. In a mix you should figure out what those main elements are so you don’t have a mess of a mix. For instance, you might decide focus is snare, vocal and guitar. This is mixing within the “Rule of 3’s”.
Use the concept of “Rule of Threes” when giving instructions to vocalists. With vocalists, I limit my new instructions for them to three at a time. Once they are doing effortlessly what I’ve asked for in the first sets of instructions, then I can add more. Some vocalists will pick things up quick and others take more time. So really pick your first three goals carefully, there’s a chance you won’t get more than that. It’s your responsibility as producer to get what you want from the singer without clogging their mind with too much technical data. Explain what you want in the simplest terms possible – if it doesn’t work then explain it a new way.

CONCEPT – Vocalist should only have three concepts at a time they are trying to master during a recording session.

If you overload the recording artist with more instructions than they can process, they WILL lose confidence, they WILL start to falter and they WILL lose focus on the recording. In fact, you may never get that confidence back. Be very careful with your moves. Vocalists are human and often frail. It is because their voice is part of their human body, it’s VERY personal. Unlike any man-made instrument. Maneuver through this process with grace and you will have more sessions booked than you know what to do with. Hammer your vocalist into the ground and you’re out of work.

VOCAL RECORDING SESSION SETTINGS

Many producers pre-produce their vocals right onto the track with eq and compression settings. With the exception of tube warmth from the preamp I don’t care to do this. Once it’s laid down it’s forever, so I recommend recording flat and doing all fx and contouring in post. (“Pre-production” or “pre” is fx going down on your main track, like if you went from your preamp into an eq/compressor then onto your track. Can’t change it later. “Post-production” or “post” is what you add after the main track is recorded.)

Give the vocalist a fighting chance with a little bit of colour in post of their lead track. Using ProTools I will assign one main track for actual recording. Then I’ll have several more blank tracks that I will copy the main vocal take into. On the main recording vocal track I’ll usually have very light compression (attack 3ms, 3:1 ratio and threshold to compress no more than 3db for normal singing. This also depends on the vocalist and style of music for how much breathing is needed in the sound.), light small reverb, light hall reverb (with a delay to offset the small reverb) and eq (very light at first, roll of lowest bass, boost mid-range presence and give sparkle around 10k – never more than 2db on boosts).

These settings will give the vocalist some shape to their sound. Note to keep your compressor settings light so the vocalist has some dynamic control during recording. It can throw them off to not hear their dynamics as their used to.

Work hard. Study. Be nice. Produce that music well.

If readers have any more tips or insights please post them as comments here. Thanks!

George Gershwin and Oscar Levant Banter

 I don’t have confirmation on the authenticity of this, but I like the story. It is about “badinage” which is “light trifling raillery or humorous banter.” It’s from the French word ‘badin” which means “joker.”

Another wonderful example (of badinage) showed up at a Manhattan party in the 1930s, attended by George Gershwin, Oscar Levant, and a number of musicians and show business personalities. Levant and Gershwin, good friends, as well as musical colleagues, often engaged in friendly banter with one another. This particular evening, Levant said, “George if you had to do it all over, would you fall in love with yourself again?” Even though everybody knew Levant was teasing, they waited eagerly to see how Gershwin would respond. The great songwriter ignored the remark and rejoined with a playful insult of his own:

Oscar, why don’t you play us a medley of your hit?

Shigeru Miyamoto

 shigeru_miyamoto.jpg

Shigeru Miyamoto
Miyamoto demonstrating the Wii Remote during the E³ 2006 press conference.
Born    November 16, 1952
Sonobe (now Nantan), Kyoto
Occupation    Senior marketing director, Nintendo
General manager, Nintendo Entertainment Analysis and Development.
Spouse    Yasuko Miyamoto

Shigeru Miyamoto is the designer that put Nintendo on the map and saved the company from bankruptcy. He is also the composer of the original Donkey Kong video game music – which he composed on a little home keyboard.

Shigeru Miyamoto (宮本 茂, Miyamoto Shigeru?, born November 16, 1952) is a Japanese video game designer. He is the creator of the Mario, Donkey Kong, The Legend of Zelda, Star Fox, Nintendogs, Wave Race, and Pikmin video game series for Nintendo game systems.

He is one of the world’s most celebrated game designers, and is often called the father of modern video gaming. His titles are characterized by refined control-mechanics and imaginative worlds in which the players are encouraged to discover things for themselves, as well as basic storylines, which had been almost unheard of before he introduced one of the first, featuring Mario.

Employed by Nintendo (then a Hanafuda manufacturer) as an artist, in 1980 he was given the task of designing one of their first coin-op arcade games. The resulting title Donkey Kong was a huge success and the game’s lead character, Jump Man — now called Mario — has become Nintendo’s mascot. Miyamoto quickly became Nintendo’s star producer designing many franchises for the company, most of which are still active and very well-regarded. He has also given to many charities as well.

Shigeru Miyamoto has two children with his wife, Yasuko Miyamoto, who was general manager of Nintendo of Japan in 1977. Neither of their children has expressed a desire to go into the family business. He is currently the Director and General Manager of Nintendo Entertainment Analysis and Development (EAD), the corporate sector of Nintendo of Japan. In 1998, Miyamoto became the first person to be inducted into the Academy of Interactive Arts and Sciences’ Hall of Fame.

Early life

Shigeru Miyamoto was born in Sonobe (now Nantan), Kyoto, Japan. As a young boy, Miyamoto loved to draw, paint pictures, and explore the landscape surrounding his house. Stories describe his fascinated discovery of hidden caves, lakes, and other natural features which were linked to his later work. In 1970, he enrolled in the Kanazawa College of Art, and graduated five years later, though he would later remark that his studies often took a backseat to doodling. In 1977 Miyamoto, armed with a degree in industrial design, was able to arrange a meeting with Hiroshi Yamauchi who was a friend of his father and the head of Nintendo of Japan. Yamauchi hired Miyamoto to be a “staff artist” and assigned him to apprentice in the planning department.

Nintendo

In 1980, the fairly new Nintendo of America was looking for a hit to establish itself as a player in the growing arcade market. After successful location tests using prototypes, NoA CEO Minoru Arakawa ordered a very large number of units of Radar Scope, an arcade game. However, by the time the arcade machines could be produced and shipped to the U.S., interest had vaporized, causing Radar Scope to be a huge flop. To stay afloat and clear the costly inventory of Radar Scope, Nintendo of America desperately needed a smash-hit game that the unsold machines could be converted to play. Yamauchi assigned Miyamoto, the only person available, the task of creating the game that would make or break the company.

After Miyamoto had consulted with some of the company’s engineers although he had no prior programming experience, and composed the music himself on a small electronic keyboard, Donkey Kong was fully conceptualized. When the game was complete, the chips containing the new program were rushed to the U.S. and Nintendo employees worked around the clock to convert the “Radar Scope” machines. It was fortuitous that Nintendo had so many units on hand, because Donkey Kong was an overnight success, and not only saved the company, but introduced the character who more than any other would be identified with Nintendo.

The three most famous characters Miyamoto created for the game were Donkey Kong, Jump Man, and Pauline. It was Mario, a character who descends from Jump Man, that has found the most success, and since his debut in Donkey Kong he has appeared in more than 100 games spanning over a dozen gaming platforms.

Miyamoto is usually listed as “producer” in the credits of Mario games. The few exceptions include the Super Mario Land series for the Game Boy, which he had virtually nothing to do with. (Gunpei Yokoi, Miyamoto’s mentor, produced the Super Mario Land series.) In early U.S. releases, he was sometimes credited as “Miyahon”, a mistransscription of the kanji in his name (本 — which can be read as either hon or moto). The mistranslated surname was Miyamoto’s development nickname in the 1980’s (having a nickname was a common practice among Japanese game developers at the time).

At E3’s convention in 1997, Miyamoto revealed that he was constantly working with around four hundred people on a dozen or so projects at a time.[1]

Despite being an influential figure in video games and responsible for multi-million dollar franchises, Miyamoto is said to be very humble, insisting on settling for an average income, and often rides a bicycle to work.

Humidity Effects on Tuning and Intonation

Here’s the quick read for this post: Humidity changes can severely affect the intonation of orchestral groups. Air conditioning needs to stablize the performance venue temperature before the orchestra shows up. Lower temperature will automatically reduce humidity. If you are still stabilizing the room temperature (which also lowers humidity) when the orchestra shows up on a very humid day, you may have severe intonation problems. Yes, it’s a big deal.

I conducted a show recently where their were wild intonation problems in the orchestra. It was like night terrors I have sometimes, but this was real. All my ace players out of tune. Happened one by one until it was so rampant I could not distinguish who was out of tune and how far, because it was almost across the board.

It became a musical detective mystery story to figure out the cause of the problem. Many orchestra members provided theories about it but they all seemed to fall short. I am not one who buys into the “we’re having a bad night” excuse. Not with all my ace players across the board playing out of tune.

The title of this post has already given the culprit away so there is no mystery for you. After talking with the technical director of the concert hall we determined it was the high humidity causing intonation problems in the orchestra. The air conditioning was turned on a couple hours before the show and this is a mid-sized opera type hall, fairly large with around 700 seats. By the second act the humidity was much lower and things returned to normal. But during the first act the temperature and humidity were still being “conditioned” – in other words the humidity level was changing slightly during the whole act, instruments were warping accordingly to create intonation problems that were changing on a continual basis. To describe the change in humidity over a 90 minute period – it was like going from a Memphis, TN humid sticky summer to the chill and dryness of a typical movie theater. Drastic changes in a short time frame.

It is surprising that no one had come across this in the hall before. But this was a mid-summer day with an almost freakish high humidity on the day of performance. Was also a mid-day show and not in the evening. I asked the technical director of the venue “How do the other orchestras deal with this?”. As it turns out most of the other orchestral performance groups don’t perform in the summer because it’s their break time. So they had never encountered it, much less on an incredibly humid mid-day.

Here’s what you should know about humidity and orchestras, straight from Conrad’s School of Hard Knocks:

1) Humidity is lowered in cooler temperatures. You will cut down your humidity just by lowering the temperature.

2) Instruments most affected by humidity are made of wood and come into contact with non-wood pieces, ie: string instruments (guitars, violins, etc.). Next most affected after violins will be your woodwinds. If your brass is tuning off these instruments by ear during your show, they will fall like dominoes trying to follow the string and woodwind tunings. Argghh!

3) Changes in humidity cause the problems, not just the humidity itself. If your air conditioning system is in the process of still bringing down the temperature (thus lowering the humidity level) during a performance, you may be in trouble. Room environment should be at showtime conditions before your musicians being warming up.

SOLUTION:

The solution for all this is very simple, and of course seen in hindsight with 20/20 vision: Turn the air conditioning on in plenty of time before the performance so the room is at a stable temperature before the orchestra arrives. Ta-Da! Yes, it’s that simple.

I should note that the particular hall this happened at has a very sophisticated air conditioning system. Am told the system monitors Co2 content to know how much new air to circulate.

Thank you to my orchestra that suffered with me through this detective process and to the tech director who helped me figure it out. Hope this helps – here’s more info I found on the web about intonation, tuning and humidity. Surprisingly, I found nothing from other conductors or music directors on this subject. I would think this would be a common bane with MD’s working with large acoustic groups.

The Happy Ending: This story DOES have a happy ending. I was prepared to be thoroughly tarred and feathered for the intonation problems – but thanks to additional sound tweaks we had made with our sound crew, many people felt it was the strongest show of the run. (Wipes brow.) And now I have more knowledge under my belt. Unfortunately, I don’t think many will find this music info post until AFTER they’ve had a problem. We’re all still learning…..

Excerpt of “Wood, Temperature and Humidity”
by B.J. Fine – Original Article

The capacity of the air to hold moisture is proportional to ambient temperature; warm air can hold more moisture than cold air. Given a proscribed space e.g., a room, as warm air in it is cooled and the capacity of the air to hold moisture thus decreases, relative humidity in the space will rise. As cold air in a space is warmed and its capacity to hold moisture increases, relative humidity in the space drops. Such changes in temperature and moisture characterize the temperate climates in which most harpsichords live. In general, in winter, the greater the difference between inside and outside temperatures, the lower the interior RH will be (assuming no inside humidification).

Humidity Effects on Piano
Original Article by “Piano Man Inc.”

By far, the main reason why pianos go out of tune is due to rapid changes in humidity that occur when there is a climatic shift from one season to another. Changes in humidity affect all pianos – new and old, those that are regularly played and the ones kept neglected in a corner. Pianos go flat in the winter months when dry heat expelled from your furnace draws moisture out of the piano’s soundboard. In the spring, when you turn the heat off, the air is usually more moist. The soundboard absorbs this moisture, expands and causes the piano to go sharp by the summer. These seasonal changes in tuning are most obvious in the mid-range of the piano.

Relative Humidity Chart
Note 100% Relative Humidity is “Dew” level

relative_humidity.png

Intonation Variation by Temperature Change
(Listed in cents on chart – 100 cents equals a half step)

soundspeed_centemp.gif

Should I worry about humidity?
As an owner of acoustic instruments, you should worry about large, drastic humidity changes. While the outside of your instrument is finished to protect against moisture and dirt, the inside is not. In humid conditions, unfinished surface absorbs water and the wood swells. In dry conditions, the wood loses water and shrinks. While small, gradual fluctuations in humidity should not worry you, large, sudden changes and prolonged dryness are genuine cause for concern. Tone wood suppliers carefully select, cut and age woods for a minimum of four years to ensure that the wood is both stable and responsive when used in an instrument. Aged tone woods generally have moisture content between 40% and 60%. And, because wood changes size with moisture content, instrument builders keep humidity in their workshops very stable, typically at 50%. In this way, luthiers ensure that the wood that they shape or glue will not be swollen or shrunken relative to the other wood in the instrument. Relative swelling and shrinking of the wood remains important after the parts are glued together to make an instrument.

What Can I Do About Humidity?
In humid periods:

1. keep instruments in air-conditioning,
2. if air-conditioning isn’t possible and you note undesirable changes, take instruments to a repair technician for seasonal adjustments.

In dry periods:

1. keep instruments away from heaters,
2. use room- or instrument- humidifiers where you store instruments.

Take instruments that crack for repair immediately to increase the possibility of complete repair.

Remix Approach and Elements of Music

There are three basic elements to music:

  1. Melody
  2. Harmony
  3. Rhythm

In a song form you also have the element of: Lyrics.

When doing a remix, these are the four elements you are going to play with. If you change all four, then you have a completely different song, not a remix. Most commonly the melody and lyrics stay the same. Changes are made to the harmony and rhythm. Think of the last remix you heard (famous examples include “Knock on Wood”, “Red Red Wine” and “Lean On Me” – good chance it was the harmony and rhythm they changed.

For a parody, the opposite is true. A parody may change only the lyrics. The point being to sound kind of like the original, with new words.

For a jazz or big band arrangement it is largely the harmony and rhythm that will change. Melody will become swung instead of straight and harmonies will be more complex and “outside” (many times just adding 11th and 13th chords with a little swing can do the trick).

You can take any song and keep the lyrics while changing all other elements and most people will still recognize it as the original song (if they can understand the lyrics). A good example of this recently is the remix of “Somewhere Over the Rainbow”. The arrangement is not concerned with hitting the wide range of the original melody, only in alluding to it in a relaxed manner.

When approaching a remix, make a conscious decision about what elements you are going to change. Remixes are sometimes the result of an open jam, but more often the focused effort of a producer is involved. They may not think in such rigid terms as put here in “melody, harmony, rhythm, lyrics” – but the producer is effectively making the same decisions.

You can also use this as an approach to songwriting. Take a song you love, change all four elements and you have a totally new song. Remember, good composers borrow – great composers steal.

If using this approach to create new works and songs, always make sure your changes are drastic enough so there are no telltale signs of the original left that could lead to copyright infringement. If just changing a few elements of an existing published song, you can get a mechanical license to make it legal. Check with the song publisher on how to acquire a mechanical license – usually it’s through BMI, ASCAP or the Harry Fox Agency in New York.

Skagit Valley Vocal Instructors

If you want to improve as a vocalist it’s important you take private lessons. Voice is not like other instruments. It sounds different in your head than it does to other people. A good voice teacher will help you to visualize and master your own vocal production anatomy, which is a difficult task. You can’t see the muscles that control your voice like you can watch your own fingers on other instruments. That’s why you really need a trained ear to guide you.

I’m often asked to recommend a vocal coach, but sadly it’s rare that people actually follow through. They seem to feel their voice is ok and getting better on it’s own. With few exceptions that’s just not going to happen. You can slide by in alternative recordings and live bands, but if you’re serious about musical theater a trained voice is needed. Please get a personalized coach.

In the Mount Vernon, WA area, Camano Island, Stanwood – here are some voice teachers I recommend. This certainly isn’t an exhaustive list – just people I know personally that do excellent work (their students are top notch singers). If your name isn’t on the list or you want to leave contact info – please add a comment to this post so vocalists can use this as a resource for getting lessons from a good vocal coach.

Recommended Voice Teachers (Alphabetical)

Dianne Johnson (Skagit College)
Kathleen Kournihan (Camano Island)
Brenda Mueller (Camano Island)
Sharyn Peterson (Mount Vernon)
Another good resource is to contact Western Washington University in Bellingham, WA.

If you are a voice instructor in Washington State located from Seattle to Anacortes to Bellingham, please leave a comment with your contact info as a resource to students. Thanks!

Music Games for Piano Players and Kids

I am a vocal instructor for the META Performing Arts summer theater camp. I teach two age groups: Teens and 8-12. I couldn’t find much online for live excercises with kids that would teach vocal technique and be entertaining. Here are some things I came up with that you might find helpful.

Kids 8-12 Age Group
Children in this age group keep their attention well if they’re interacting with each other. So I try to tailor all excercises in a way that they interact and perform for each other. If they are just singing for me it’s hard to keep their attention. Think of yourself as a referee that gives guidelines and then let them run the show.

MUSIC ACTIVITIES AND GAMES

Jazz Scat – Pianist plays a 12 bar blues progression in swing style. Start with a call and response – give the kids a scat line and have them repeat it as a group. Then go down the line and have each one sing individually. At first they will probably be very shy. If you keep at them, as soon as one jumps out and performs the scat with energy, the others will follow suite. It’s an interesting psychological phenomenon. If your first performer does a lame performance, the rest will follow suite. If the first person really goes for it, the rest will also step up to the plate. Start with a strong lead. At first just have them do four bar phrases. When they are comfortable with that keep increasing the scat time up to a full 12 bar phrase. Have the kids clap after the full performances to encourage the best in all.

Scat Tag – Kids have to scat with the piano 12 bar groove until they tag another person, then that person has to take it over. This is a good way for the hams in the group to scat for a while, and those that are still shy can tag someone quickly. They have control and they are interacting with each other – good results on this one.

Act the Mood – Piano player plays different moods on the piano and the kids have to act it out. Play circus music, melodrama chase music, Linus and Lucy theme – any music that has a definite and quickly recognizable mood. There is no right or wrong on the child’s interpretation. It gives them a chance to listen for what the music is expressing in mood to them.

Vocal Improv Weakest Link – Selling It – Have kids make a circle and choose a referee in the center. Children have to improvise singing to the piano while “selling the song”. Whatever they need to do with energy to make the referee “buy” that they are performing on the big stage. Audiences often listen with their eyes and this is a good way to encourage children to perform their songs visually and to really jump out with their vocal courage. This is another one where it takes a while for the kids to catch on and really perform. If the referee doesn’t feel the vocalist is selling the song, they are eliminated. I make it a point to talk to the first round eliminations afterwards and help them individually on selling it stronger. Then I tell them, “I don’t want to see you get eliminated in the first round this time.” So far, they don’t. They really do perform better (also helps to have a referree that understands this and doesn’t eliminate them first round). It is scary for some at first, but if you get them to improve quickly it’s a good confidence builder. You can use jazz scat for this too. Do this one after they’re very comfortable with the jazz scatting.

Vocal Story Improv – Play a simple pop progression on the piano with a nice laid back groove (I use V-vi-IV-I in key of Bb, C or D). Play it in straight eights for a change from the jazz feel. Start with call and response – then have them improv on their own twice around the progression each. Now have them also improvise lyrics to create a song (yes, they can do this if encouraged). Last step – the lyrics improvised have to be built on the person before them to create a fluent idea for the song. This is similiar to the story game where each person says a sentence in turn. I find it much more engaging when they are singing. And because there’s a tempo to stick to, they really say what’s on the top of their head without lagging. I have seen many lightbulb’s go on in people’s heads with this one. Keep doing it and you will see very creative moments, and children realizing how much they can really do that they hadn’t thought of before.

If you have an extended time with the kids and have access to recording gear, you could have them each sing lines of lyrics in turn – then edit them into a finished song. Might be a good idea to give them a set chorus to begin with and they can improvise the verses.

If you have other music games that have gone well for you in the past, please post them here so we can all use and learn from them. Thanks!